The Roles section
This topic describes what user Roles are and how to manage them in the Roles section of the System Administration area.
Roles are security profiles that you associate with Board users in the Users section of the Subscription Hub. They contain information that defines a Board user's access to the Data models of a Platform (via Database Security profiles and security selections) and access to various Platform features (via Application Profiles that are managed in the Features section).
Roles (and the associated Application Profiles) represent the second security layer of Board's Four Security Layers model.
To access the Roles section, access the System Administration space of the desired Platform and click on the Roles tile. You will be taken to the Roles page.

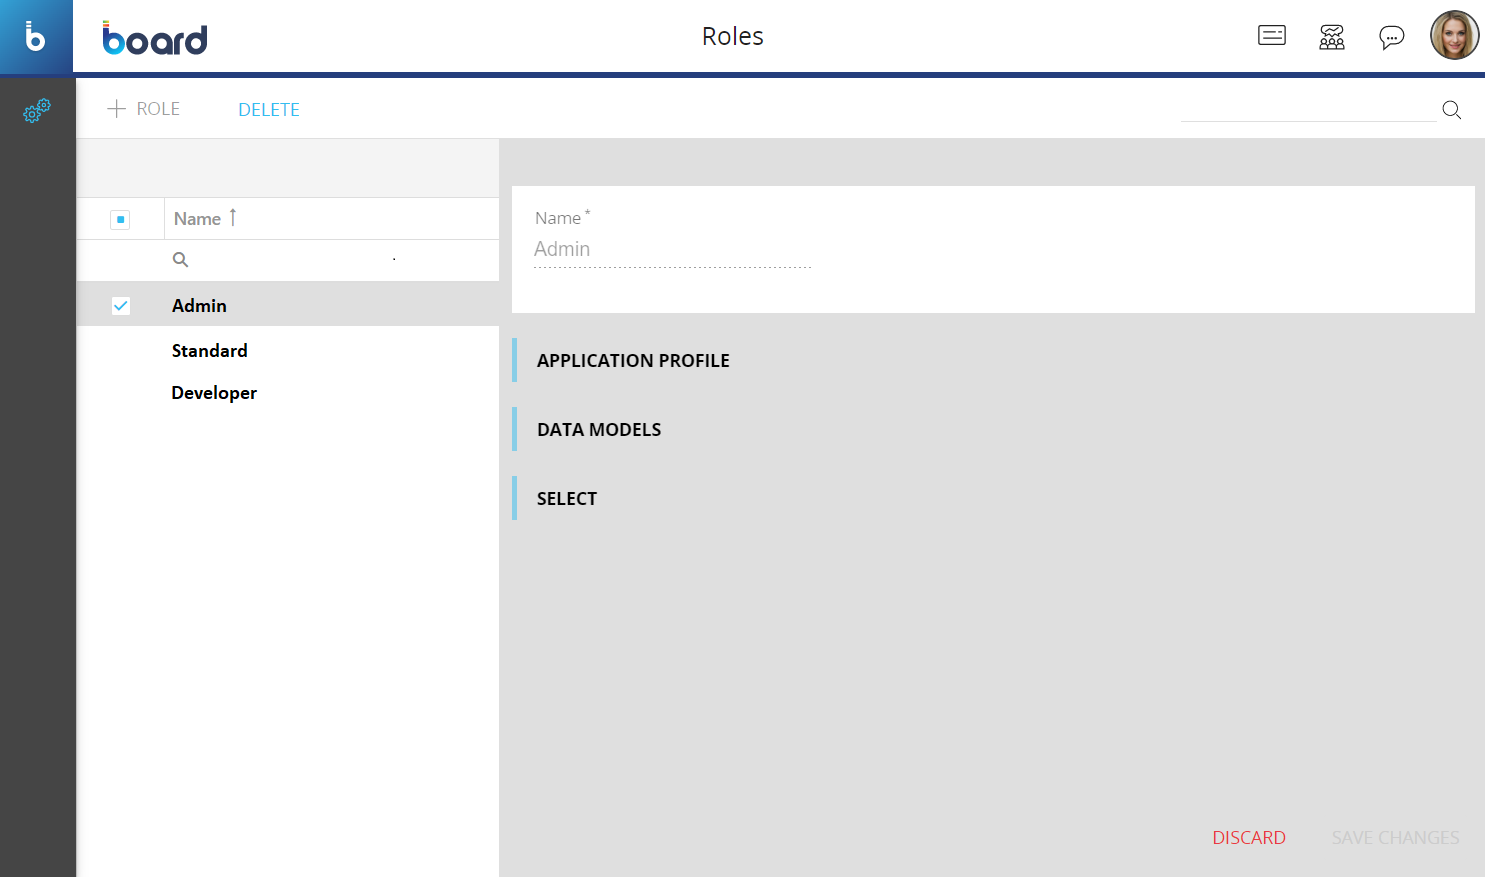
In the Roles page you can see all existing Roles and their main information: the table is sortable and searchable using the interactive header fields. You can also show or hide columns to your liking, by clicking the Column chooser button in the upper right corner of the table.
The table contains the following information:
- Name. This column displays the name of each Role
- Default database security profile. This column displays the name of the default Database security profile associated with each Role. See Database security for more information
Creating a Role
To create a Role, proceed as follows:
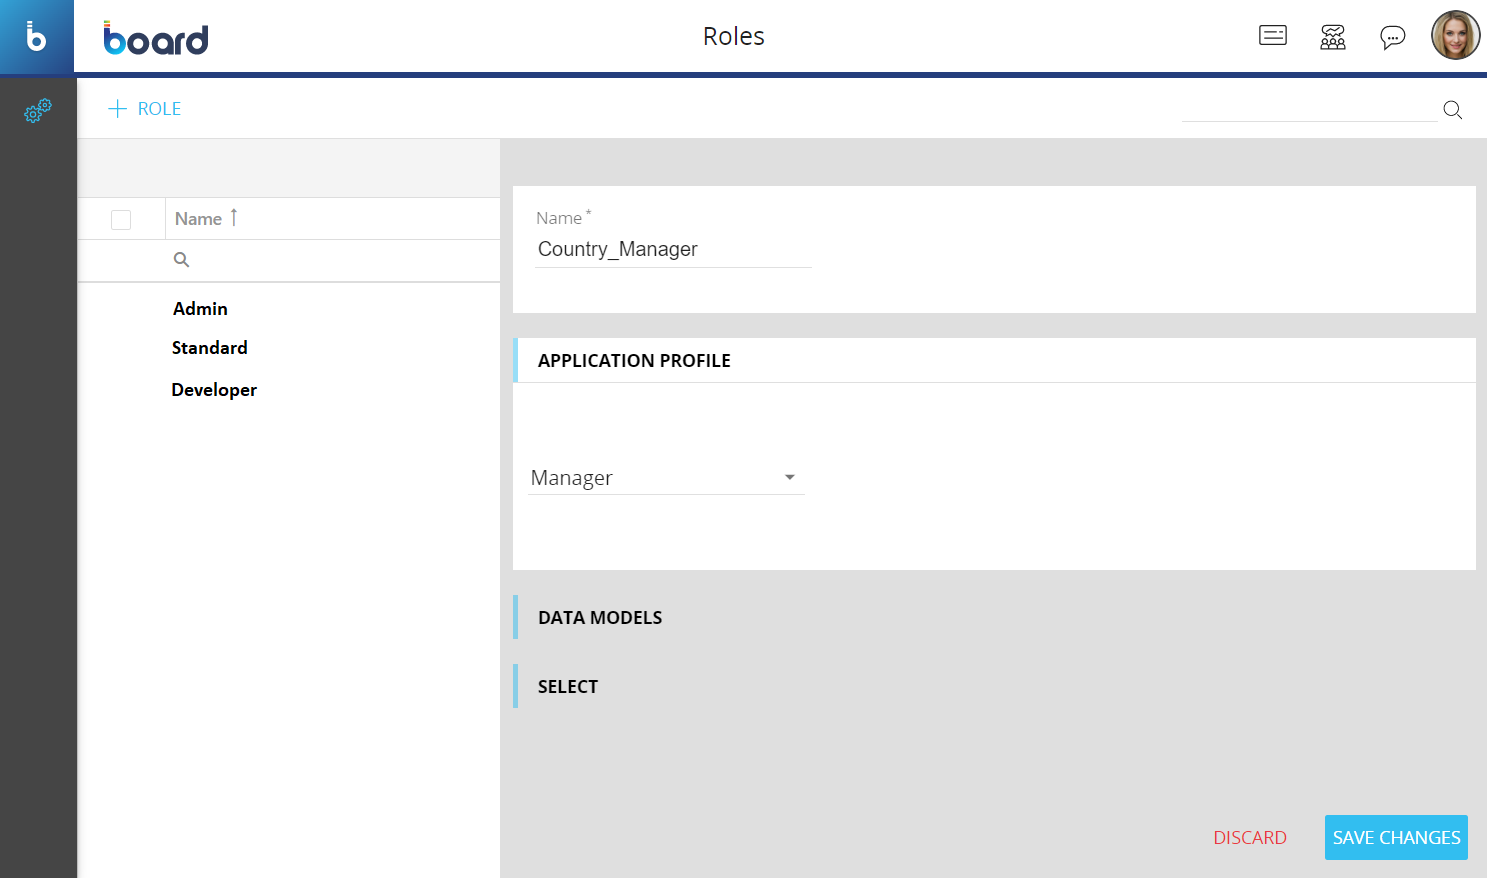
- Click on “+ROLE” in the upper left corner to bring up the Role configuration panel
- Enter the name of the Role in the "Name" field.
- Choose an Application Profile from the drop-down list under the "APPLICATION PROFILE" menu

- Associate Database security profiles. Enter the name of an existing Database security profile in the "Default database security profile" field under the "DATA MODELS" menu to associate it with a Role. In addition, you can specify a Database security profile for each Data model separately. To do this, select a Data model from the "Data model" drop-down list, enter the name of the Database security profile in the "Profile" field and click on "ADD DB PROFILE". When a user enters a Capsule, the Database security profiles are applied in the following way:
- Roles without an associated Database security profile. A user with this Role will not have access to values stored in the Cubes of any Data model that contains at least one Database security profile; the user can access values stored in the Cubes of only Data models that do not contain any Database security profiles
- Roles associated with only the default Database security profile. A user with this Role will have access to values stored in the Cubes of all the Data models that either contain that same Database security profile, or do not contain any Database security profiles
- Roles associated with different Database security profiles for different Data models. A user with this Role will have access only to values stored in the Cubes of the specified Data models, provided they contain the specified Database security profiles. In the case of a Role with both the default Database security profile and the specific profiles for different Data models, the specific ones will be applied first and the default one will be applied after, even if a Data model contains both security profiles. For example, if you associate a user Role with both a default "MANAGER" profile with full privileges and the "STANDARD" profile with limited privileges to a specific Data model, the user will access that Data model with the "STANDARD" profile, even if the Data model contains both security profiles
The rules above also apply when a user tries to access the Data model design space of a Data model.
The type of access to a Data model and its resources depends on the authorizations of the Database security profiles associated with the Roles. See Database security profiles for more information.

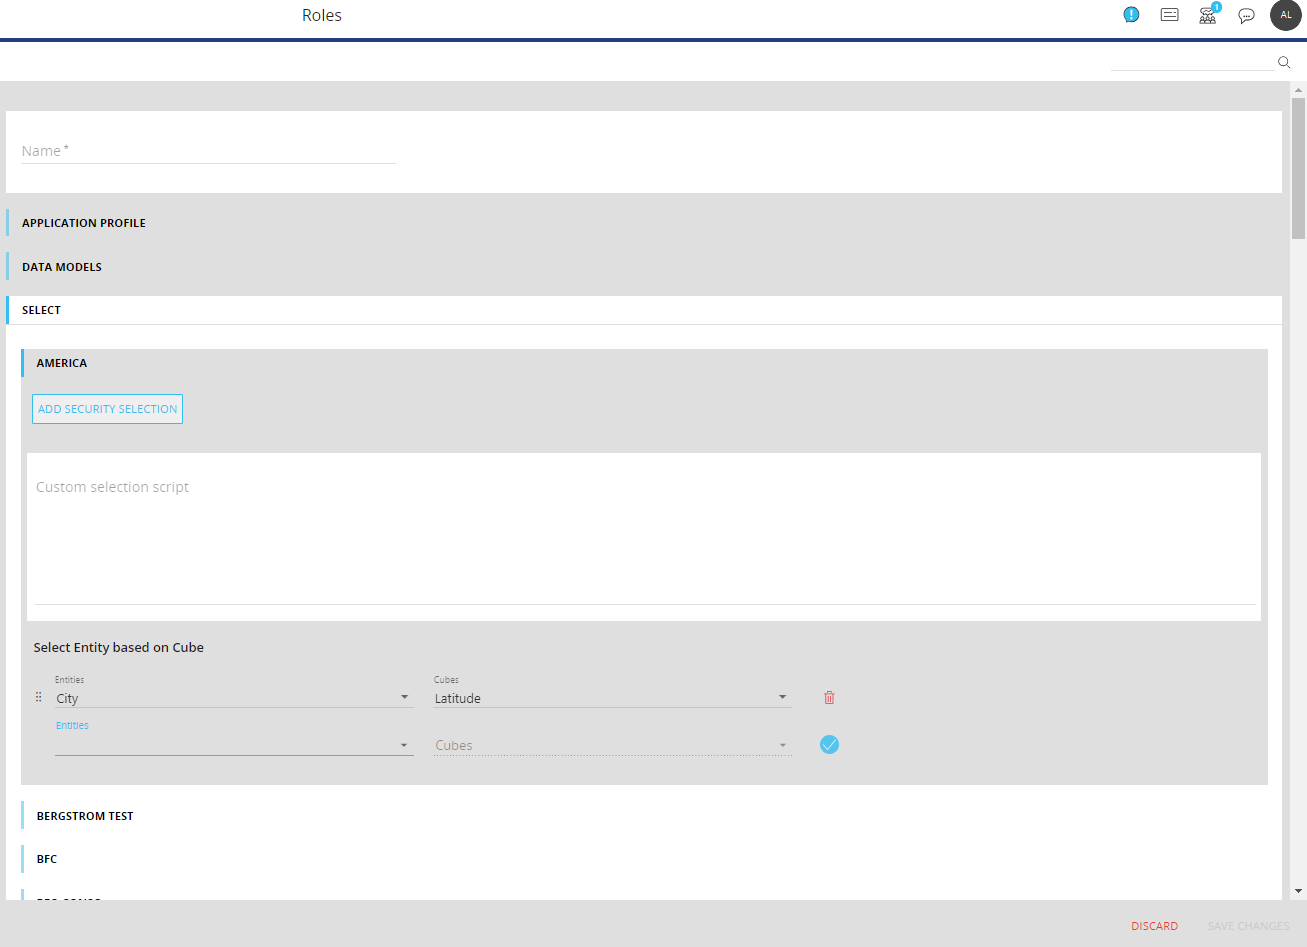
- (Optional) Configure selections. If needed, you can configure and apply security selections and custom selection scripts to a user Role for each Data model under the "SELECT" menu. These are filters that allow you to restrict access to data in Cubes or Entities, both in the Capsules/Presentations environment and in the Data model designer space. You can do this by applying a selection to the Entity members associated with the desired Cube or feature: users affected by these selections will only have access to values and data within the applied selection. To configure the selections, proceed as follows:
- Add security selections. Open the “SELECT ” menu, click on the desired Data model, and click on “ADD SECURITY SELECTION” to open the Select window and configure a security selection by choosing the desired Entity members that you want the user Role to have access to. Only data related to the selected Entity members will be visible to the user associated with this Role
- Add a Custom selection script. Open the “SELECT ” menu, click on the desired Data model, and enter a Custom selection script in the “Custom selection script” field by using the following syntax:
SELECT EntityName=Member1,Member2,Member3,etc. (for example, SELECT Country=France,Italy)
The Custom selection script can also be used to dynamically filter data displayed in Board for each user by using Security Filters in Security filters, Substitution formulas or Metadata variables. See Add and manage User metadata to use selection scripts based on custom user metadata defined in the Subscription Hub. Read the Security filters section for more details on Custom selection scripts, including unbalanced hierarchies special select scriptsIf you configure security selections and custom selection scripts on the same user Role, Board will apply the security selections first, and then it will apply the selection based on the custom selection scripts, following their order from top to bottom.
Selections applied in Play mode can also be saved using Select Bookmarks, even if the "Deny selection editor" option is enabled on the security profile associated with the active user.These selections at a Role level are meant to enrich the flexibility given to Makers when defining the security architecture, for example, defining certain entities at Role level and then further restricting them at the Database level.
Do not overlap these definitions on the same entities for which security has been defined at the Database profile level, at which the security should be simply defined.
- Add a Security Select based on Cube. Open the "SELECT" menu. Select the desired Data model from the menu. Select the desired Entity from the "Entities" drop-down list. Select the desired Cube from the "Cubes" drop-down list. Click the blue check mark on the right to add the Dynamic selection. Read more about the details of the "Select the Entity based on Cube" feature.

- (Only if Folder security is enabled) Associate Folder security profiles. Open the "FOLDER PROFILE" menu and enable the desired Folder security profiles in the list to associate them with a Role. The "FOLDER PROFILE" menu is visible only when the "Enable Folder Profile Security" option is enabled in the Folder security section. See this page for more information
If the Folder profile security option is not enabled, users will have access to all Capsules and Capsule Folders (of the Platforms they are associated with in the Subscription Hub) by default.
In the case of a Role associated with multiple Folder security profiles that have overlapping security rules (i.e. different access levels for the same Capsule folder), the rules with higher privileges will take precedence over the others.

- Click on "SAVE CHANGES" in the bottom right corner of the screen to save the Role.
Read more about the best practices of defining security settings at the Role level and Database level.
Managing Roles
To edit a Role, select it and modify the desired options explained in the steps of the previous paragraph.
To delete one or more Roles, select the desired ones and then click on the "DELETE" button.

Changes made to the Database security profiles and Folder profiles of a Role will have an immediate effect on the users associated with it. On the other hand, changes made to the security selections will be applied only after the user associated with the Role signs out of the Platform and then signs in again.
Changes made to an Application Profile will be applied only when the user associated with it signs out of the Platform and then signs in again.
Assign a Role to a user
To assign a Role to a user, proceed as follows:
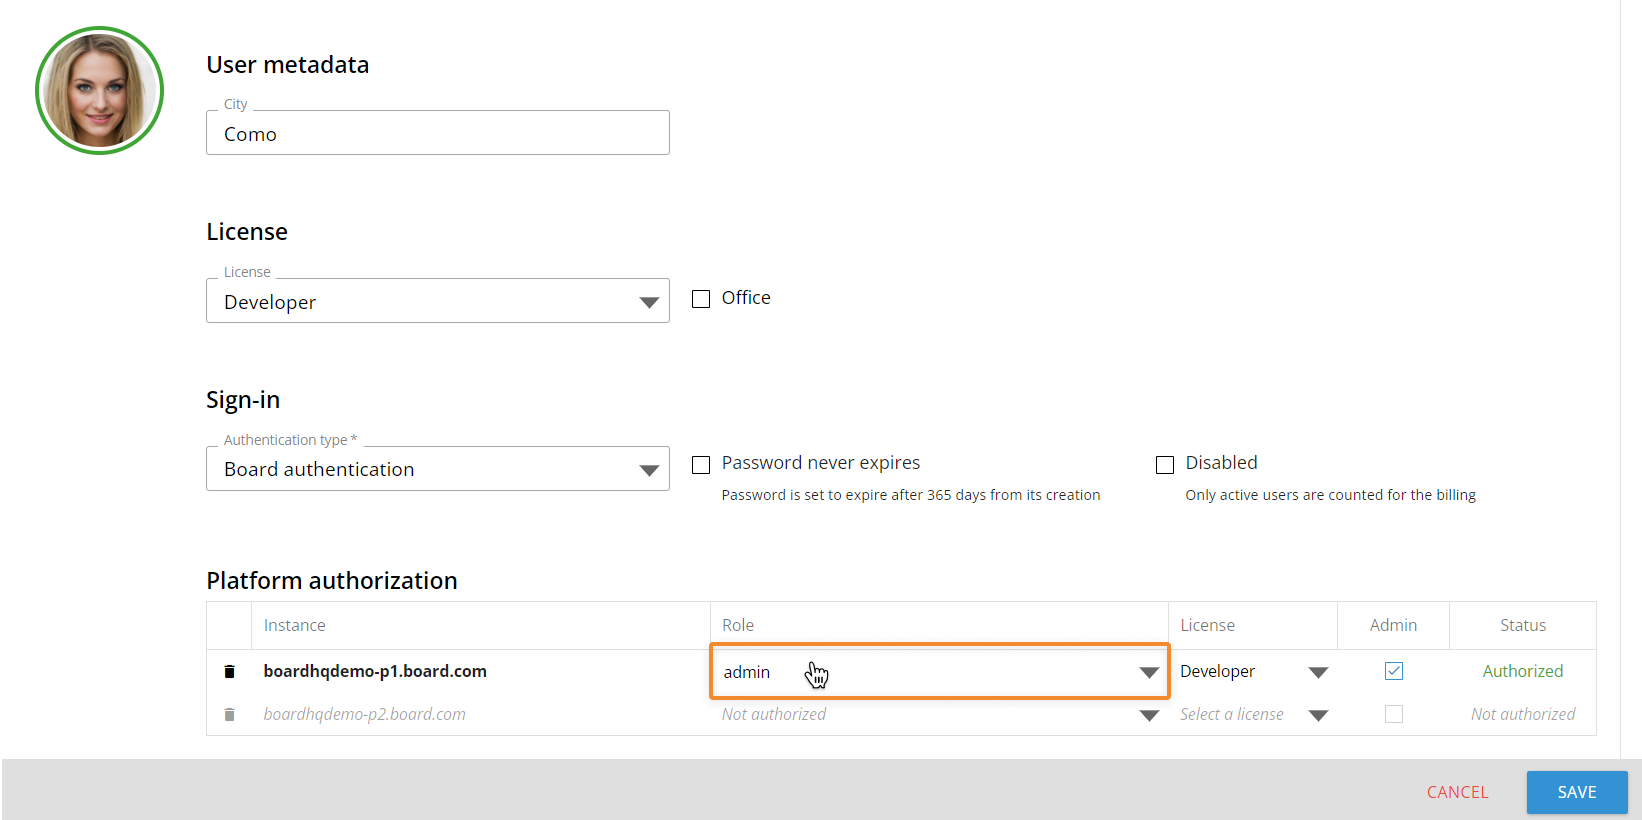
- Go to the Users section in the Subscription Hub
- Select the user you want to assign a Role to
- Choose the Role in the drop-down list under the "Role" column of the "Platform authorization" table

If you change the Role of a user who is currently logged into a Platform, the change will not take effect until the user logs out of the Platform and then logs in again.