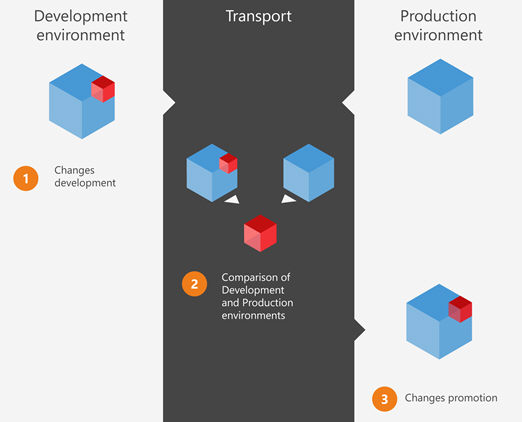
This tool supports the “Change release management cycle” and “Impact analysis” for CPM and BI enterprise solution 24/7. It allows the BOARD developer to review and analyze the impact of a design change of the data model, or of the application, and promote it to the production server, whilst keeping the system’s availability. It also provides an approval and audit trail of design and development changes to the solution.
Before version 10.1, Databases could only be transported if no changes were made in production.
Starting from version 10.1 users are allowed to develop in production, during transportation HBMP Transporter will remove changes that have been done in prod and replace them with the ones in dev
The tool has no Setup. Unzip the HBMP Transporter file in C:\Program Files\Board\ Folder of the Source Server.
E.g. If the porting must be done from Development Server to Test Server it must be installed on the Development Server.
Execute the HBMP Transporter.exe file and configure the porting accordingly provided guidelines.
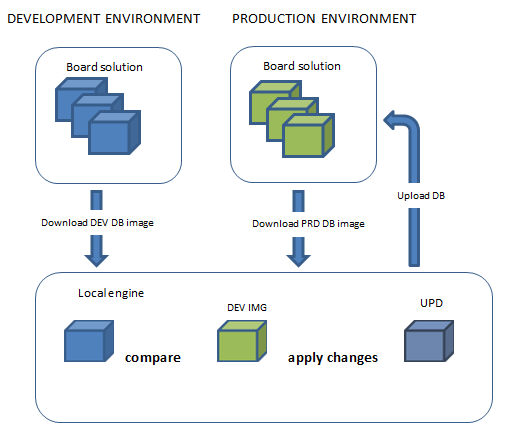
During transporter execution, a list of new folders will be created:
Path: C:\Board\Database\_DbImageDEV.hbmp
Path C:\Board\Database\_DbImagePRD.hbmp
Path C:\Board\Database\_DbImageUPD.hbmp
The following design elements can be ported by the HT transporter:
- Entities
- Cubes
- Relationship
- Protocols
- New Procedures
- Sparsities
- Rules
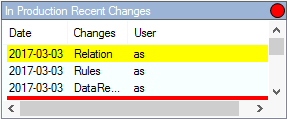
After comparing the two databases a window will show the recent prod changes in reversed chronological order.
The actions will be shown in red if there is a huge compatibility problem (new cubes or entities ), in yellow if the action has some compatibility problem (new relationships), in white if the compatibility is not compromised.
The highest incompatibility level will be shown as general alert
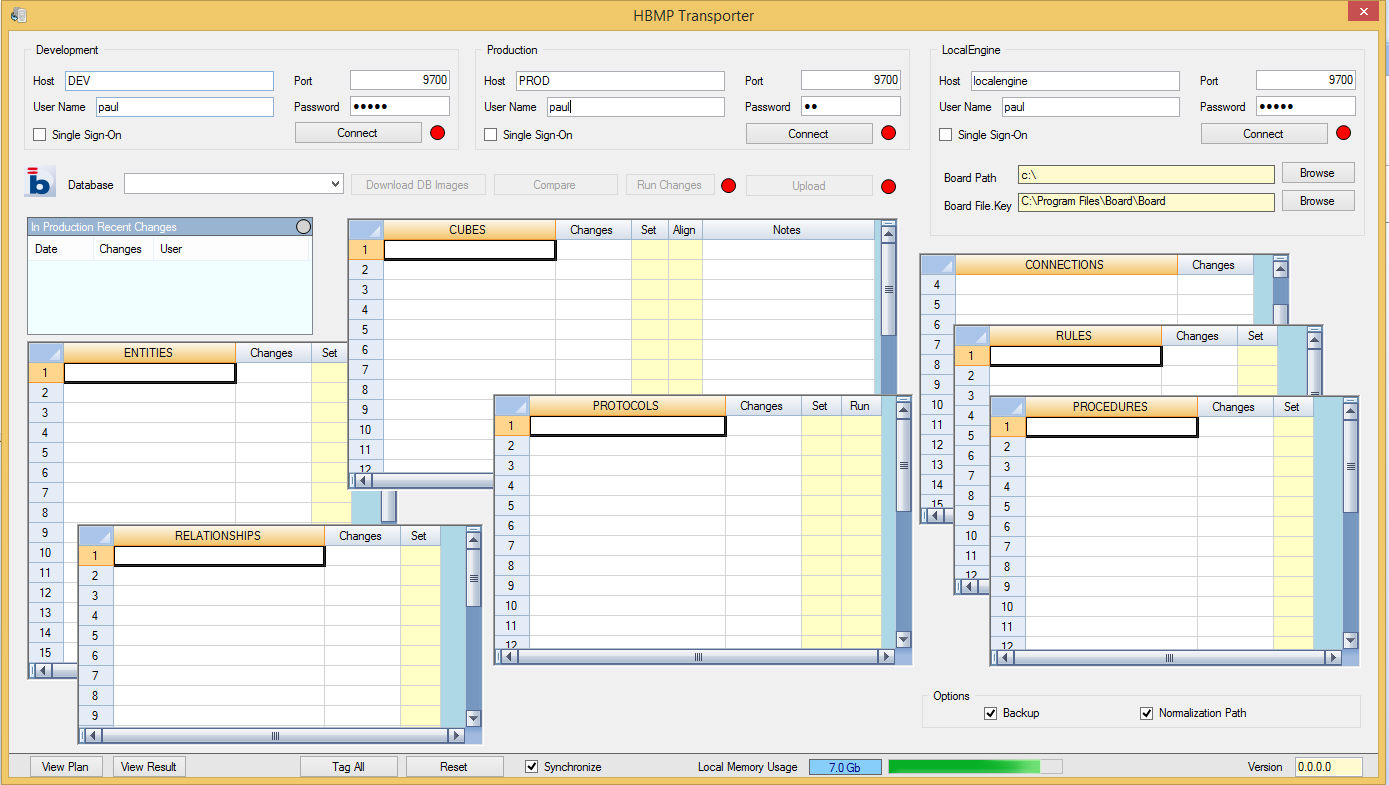
Picture below shows a quick overview to Transporter interface. Each section will be discussed in next paragraph
1 - Login and connection area
2 - Differences tables checks
3 - Logs buttons and backup options:
Backup: perform preliminary production DB backup before promote it
Logs: Shows transporter logs after running “Run changes” and “Upload” process
4 - RAM Local machine status and Board version
STEP 1 - Run
Run HBMP Transporter.exe as Administrator (mind this step is mandatory).
Following screen will come out
STEP 2 - Connect
At the top of the window you can insert access credentials and you can perform a quick connection test clicking the “Connect” button.
Connections are separately opened and immediately closed at the end of every single activity.
Fill local engine panel with all necessary information, according to your Board installation configuration.
User should have administrator privileges:
Eg:
Host: Localengine
Port: 9700
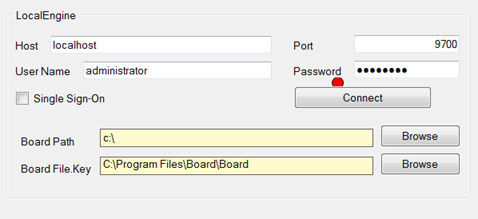
Then click on Connect button
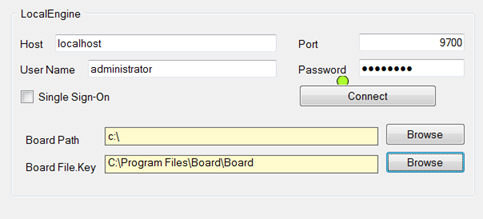
If Connect icon became green, connection has been established.
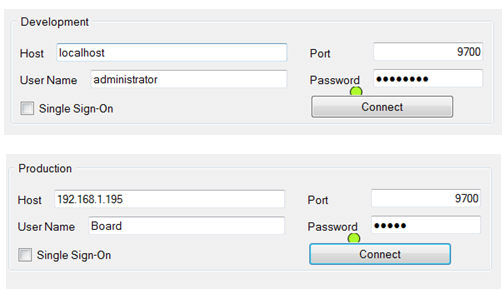
Feed Development panel and Production one, with necessary information. As mentioned before a user with administrator privileges are needed:
STEP3 – Download DB Images
After performing the three connection tests, the comboBox on the left hand side will show the list of the databases that are simultaneously present in both Production and Development environment.
Select the db that you want to transport (promote in production).
![]()
With the “Download DB Images” you will bring to your local machine all the files extracted from the two environments and containing metadata (e.g. “Dbimage”). The two new Databases “_DbImageDEV.hbmp” and “_DbImagePRD.hbmp” will be visible into the local directory \Board\Database\.
The interface won’t report anything at this point; if we have a positive outcome the “Compare” button will be activated.
STEP4 - Compare
Click on compare button to start Compare process

Transporter will show differences
between the two databases, changes made in prod and the compatibility
alert.
If you run the transporter ignoring the compatibility alert, changes made in prod will be deleted and replaced with the one in dev.
STEP 5 – Run changes
With the “Run Changes” button a third DB (“_DbImageUPD.hbmp”) will be generated in your local machine. All the “_DbImagePRD.hbmp” metadata that have been enhanced or corrected with the performed changes will flow in this third DB. At the end of this operation the opening of the resulting db (“_DbImageUPD.hbmp”) will be simulated in order to search every structural eventual inconsistency: the light will indicate the consistency of the planned change occurred.
After Run changes click, transporter creates TransportActions.txt report tracking all actions that going to perform during the process.
File can be found into C:\Board\Database\_DbImageUPD.hbmp path.
STEP 6 - Upload
Clicking the “Upload” button the HT will effectively start and promote all the selected elements in production.
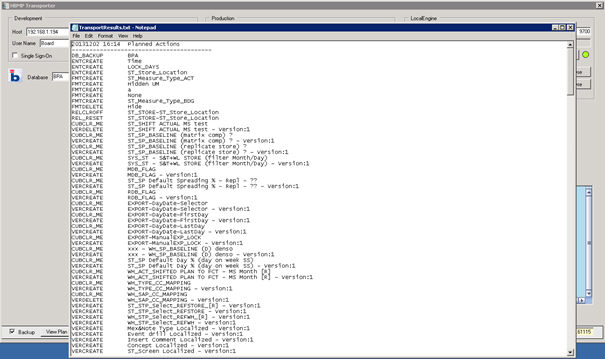
After Upload button click, transporter creates TransportResults.txt report tracking changes performed.
File can be found into C:\Board\Database\_DbImageUPD.hbmp path.
SYNCRONYZE FLAG
If you flag Syncronyze, everytime you flag an object to be transported all the changes necessary to transport it will be automatically flagged as well.
For example, if you create a new entity and a new cube containing that entity in the structure and you flag the cube, the entity will be flagged at the same time.
Note
If you are using this on a db created with a version prior to 10.1 and you are using 10.1 HBMP transporter, you will need to delete the content of the folder DBname.hbmp\common in production and copy production database to dev.
PROCEDURE
Updates performed into an existing procedure will not be promoted to production. To update a new version, move procedure .dat or delete the old one in Production.
TIME RANGE
Time range cannot be transported, HBMP transporter will only alert the user that there are changes in time range that must be done manually in prod
CONNECTION
Connection are displayed but they wont be transported, it's only to help recognizing changes that must be performed in Production