Starting from version 10.1 it is possible to print DataViews as PDF using the web HTML5 client.
In order to print a dataview click on the "print PDF" icon in the top menu as shown in the picture

If you cannot see it just expand the hamburger menu:

If it doesn't appear, just click on "show more actions"

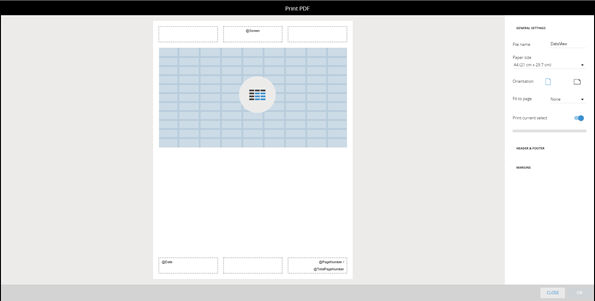
Once clicked, the following window will appear:

We can see a print template at the middle and several options divided in three sections on the right.
General Settings
Here you can set
File Name: The name we give to the exported file (it takes the dataview name by default)
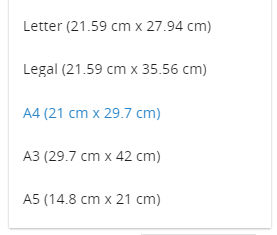
Paper Size: We can choose 5 different formats as shown in picture:

Orientation: Portrait or landscape
Fit to page: here we have three options
None: the dataview size won't be touched, columns and rows that do not fit in a single page will be printed on a new page.
One Page: the dataview is shrunk to fit it in a single page
Columns on One page: the dataview is shrunk until all the columns will fit to one page, rows that do not fit in a page will use extra pages.
Print Current Select: It generates an extra page containing the select
Header and Footer:
In this section we find header and footer settings.
There are six areas (three for the header and three for the footer) in which we can put various information.
We can write free text or we can use the board @functions, we can decide font and color.
Moreover we have some special functions that we can drag and drop in the six boxes

The icons represent: page number, total pages, date, time, capsule name, screen name, database name, title selection and username.
Margins:
Here we can set margins, we have three default settings (Normal, Wide and Narrow) or you can create a custom settings by editing the values.
Limits:
Only dataviews will be printed.
Circle alerts will be transformed in block alerts during print.